No edit summary Tag: Visual edit |
Im Going Space (talk | contribs) m (Reverted edits by 27.189.17.126 (talk) to last revision by 121.169.168.163) Tag: Rollback |
||
| Line 1: | Line 1: | ||
| + | '''Backpacks''', packs and bags are containers of varying size for carrying your hard-earned loot. |
||
| − | '''背包''',包和袋子是不同大小的容器,用于携带你来之不易的战利品。 |
||
=List= |
=List= |
||
{|class="wikitable sortable" |
{|class="wikitable sortable" |
||
! style="position: sticky;top: 10px;" |Icon |
! style="position: sticky;top: 10px;" |Icon |
||
!style="position: sticky;top: 10px;"|Name |
!style="position: sticky;top: 10px;"|Name |
||
| + | !style="position: sticky;top: 10px;"|Inner grid |
||
!style="position: sticky;top: 10px;"|Outer grid |
!style="position: sticky;top: 10px;"|Outer grid |
||
!style="position: sticky;top: 10px;"|Total slots |
!style="position: sticky;top: 10px;"|Total slots |
||
| Line 13: | Line 14: | ||
![[File:6SH118 Icon.png|frameless|250x800px|link=6SH118 raid backpack]] |
![[File:6SH118 Icon.png|frameless|250x800px|link=6SH118 raid backpack]] |
||
![[6SH118 raid backpack]] |
![[6SH118 raid backpack]] |
||
| + | |6x8 |
||
|6x7 |
|6x7 |
||
|48 |
|48 |
||
| Line 23: | Line 25: | ||
![[File:LBT-2670 Icon.png|250x800px|frameless|link=LBT-2670 Slim Field Med Pack]] |
![[File:LBT-2670 Icon.png|250x800px|frameless|link=LBT-2670 Slim Field Med Pack]] |
||
![[LBT-2670 Slim Field Med Pack]] |
![[LBT-2670 Slim Field Med Pack]] |
||
| + | |6x8 |
||
|4x5 |
|4x5 |
||
|48 |
|48 |
||
| Line 34: | Line 37: | ||
![[File:Mystery Ranch Blackjack 50 backpack icon.png|250x800px|frameless|link=Mystery Ranch Blackjack 50 backpack (multicam)]] |
![[File:Mystery Ranch Blackjack 50 backpack icon.png|250x800px|frameless|link=Mystery Ranch Blackjack 50 backpack (multicam)]] |
||
![[Mystery Ranch Blackjack 50 backpack (multicam)]] |
![[Mystery Ranch Blackjack 50 backpack (multicam)]] |
||
| + | |6x7 |
||
|5x7 |
|5x7 |
||
|42 |
|42 |
||
| Line 43: | Line 47: | ||
![[File:F4 terminator icon.png|250x800px|frameless|link=Eberlestock F4 Terminator load bearing backpack (tiger stripe)]] |
![[File:F4 terminator icon.png|250x800px|frameless|link=Eberlestock F4 Terminator load bearing backpack (tiger stripe)]] |
||
![[Eberlestock F4 Terminator load bearing backpack (tiger stripe)]] |
![[Eberlestock F4 Terminator load bearing backpack (tiger stripe)]] |
||
| + | |1x 5x4 grid<br />2x 5x2 grid |
||
|5x7 |
|5x7 |
||
|40 |
|40 |
||
| Line 52: | Line 57: | ||
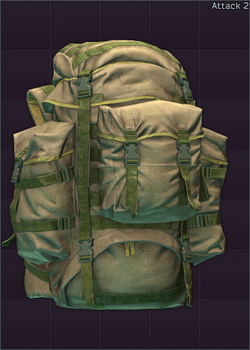
![[File:AttackInventory.PNG|250x800px|frameless|link=SSO "Attack 2" raid backpack]] |
![[File:AttackInventory.PNG|250x800px|frameless|link=SSO "Attack 2" raid backpack]] |
||
![[SSO "Attack 2" raid backpack]] |
![[SSO "Attack 2" raid backpack]] |
||
| + | |5x7 |
||
|5x7 |
|5x7 |
||
|35 |
|35 |
||
| Line 62: | Line 68: | ||
![[File:Pilgrim Backpack icon.png|250x800px|frameless|link=Pilgrim tourist backpack]] |
![[File:Pilgrim Backpack icon.png|250x800px|frameless|link=Pilgrim tourist backpack]] |
||
![[Pilgrim tourist backpack]] |
![[Pilgrim tourist backpack]] |
||
| + | |5x7 |
||
|5x7 |
|5x7 |
||
|35 |
|35 |
||
| Line 71: | Line 78: | ||
![[File:3V G Paratus icon.png|frameless|250x800px|link=3V G Paratus 3-Day Operator's Tactical Backpack]] |
![[File:3V G Paratus icon.png|frameless|250x800px|link=3V G Paratus 3-Day Operator's Tactical Backpack]] |
||
![[3V G Paratus 3-Day Operator's Tactical Backpack]] |
![[3V G Paratus 3-Day Operator's Tactical Backpack]] |
||
| + | |1x 5x5<br/>2x 1x2<br/>1x 3x2 |
||
|5x7 |
|5x7 |
||
|35 |
|35 |
||
| Line 80: | Line 88: | ||
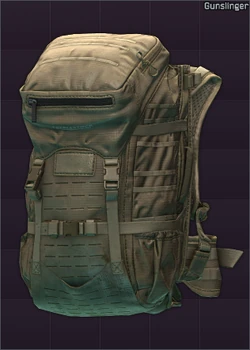
![[File:gunslingericon.png|frameless|250x800px|link=Eberlestock G2 Gunslinger II backpack (dry earth)]] |
![[File:gunslingericon.png|frameless|250x800px|link=Eberlestock G2 Gunslinger II backpack (dry earth)]] |
||
![[Eberlestock G2 Gunslinger II backpack (dry earth)]] |
![[Eberlestock G2 Gunslinger II backpack (dry earth)]] |
||
| + | |1x 3x5 grid<br/>1x 2x7 grid<br/>1x 3x2 grid |
||
|5x7 |
|5x7 |
||
|35 |
|35 |
||
| Line 89: | Line 98: | ||
![[File:Oakley Mechanism icon.png|frameless|250x800px|link=Oakley Mechanism heavy duty backpack (black)]] |
![[File:Oakley Mechanism icon.png|frameless|250x800px|link=Oakley Mechanism heavy duty backpack (black)]] |
||
![[Oakley Mechanism heavy duty backpack (black)]] |
![[Oakley Mechanism heavy duty backpack (black)]] |
||
| + | |1x 4x4<br/>4x 2x2 |
||
|5x5 |
|5x5 |
||
|32 |
|32 |
||
| Line 98: | Line 108: | ||
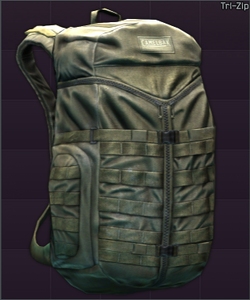
![[File:Tri-Zip Backpack.png|250x800px|frameless|link=Camelbak Tri-Zip Backpack]] |
![[File:Tri-Zip Backpack.png|250x800px|frameless|link=Camelbak Tri-Zip Backpack]] |
||
![[Camelbak Tri-Zip Backpack]] |
![[Camelbak Tri-Zip Backpack]] |
||
| + | |5x6 |
||
|5x6 |
|5x6 |
||
|30 |
|30 |
||
| Line 108: | Line 119: | ||
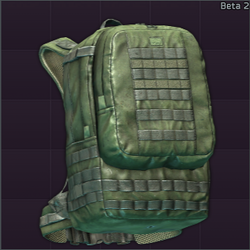
![[File:Beta2 outside.png|250x800px|frameless|link=Ana tactical Beta 2 battle backpack]] |
![[File:Beta2 outside.png|250x800px|frameless|link=Ana tactical Beta 2 battle backpack]] |
||
![[Ana tactical Beta 2 battle backpack]] |
![[Ana tactical Beta 2 battle backpack]] |
||
| + | |5x6 |
||
|5x5 |
|5x5 |
||
|30 |
|30 |
||
| Line 117: | Line 129: | ||
![[File:Eberlestock F5 backpack icon.png|250x800px|frameless|link=Eberlestock F5 Switchblade backpack (dry earth)]] |
![[File:Eberlestock F5 backpack icon.png|250x800px|frameless|link=Eberlestock F5 Switchblade backpack (dry earth)]] |
||
![[Eberlestock F5 Switchblade backpack (dry earth)]] |
![[Eberlestock F5 Switchblade backpack (dry earth)]] |
||
| + | |5x6 |
||
|5x6 |
|5x6 |
||
|30 |
|30 |
||
| Line 126: | Line 139: | ||
![[File:HazardDrawbridge Icon.png|250x800px|frameless|link=Hazard 4 Drawbridge backpack]] |
![[File:HazardDrawbridge Icon.png|250x800px|frameless|link=Hazard 4 Drawbridge backpack]] |
||
![[Hazard 4 Drawbridge backpack]] |
![[Hazard 4 Drawbridge backpack]] |
||
| + | |5x5 |
||
|5x5 |
|5x5 |
||
|25 |
|25 |
||
| Line 135: | Line 149: | ||
![[File:Hazard4takedown.gif|250x800px|frameless|link=Hazard4 Takedown sling backpack]] |
![[File:Hazard4takedown.gif|250x800px|frameless|link=Hazard4 Takedown sling backpack]] |
||
![[Hazard4 Takedown sling backpack]] |
![[Hazard4 Takedown sling backpack]] |
||
| + | |3x8 |
||
|3x7 |
|3x7 |
||
|24 |
|24 |
||
| Line 144: | Line 159: | ||
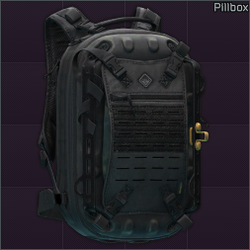
![[File:HazardPillboxIcon.png|250x800px|frameless|link=Hazard4 Pillbox backpack]] |
![[File:HazardPillboxIcon.png|250x800px|frameless|link=Hazard4 Pillbox backpack]] |
||
![[Hazard4 Pillbox backpack]] |
![[Hazard4 Pillbox backpack]] |
||
| + | |5x4 |
||
|4x4 |
|4x4 |
||
|20 |
|20 |
||
| Line 153: | Line 169: | ||
![[File:Wartech Berkut VV-102 backpack icon.png|250x800px|frameless|link=Wartech Berkut VV-102 backpack]] |
![[File:Wartech Berkut VV-102 backpack icon.png|250x800px|frameless|link=Wartech Berkut VV-102 backpack]] |
||
![[Wartech Berkut VV-102 backpack]] |
![[Wartech Berkut VV-102 backpack]] |
||
| + | |4x5 |
||
|4x5 |
|4x5 |
||
|20 |
|20 |
||
| Line 163: | Line 180: | ||
![[File:Day pack icon.PNG|frameless|link=LBT-8005A Day Pack backpack]] |
![[File:Day pack icon.PNG|frameless|link=LBT-8005A Day Pack backpack]] |
||
![[LBT-8005A Day Pack backpack]] |
![[LBT-8005A Day Pack backpack]] |
||
| + | |4x5 |
||
|4x5 |
|4x5 |
||
|20 |
|20 |
||
| Line 173: | Line 191: | ||
![[File:ScavBP Icon.png|250x800px|frameless|link=Scav Backpack]] |
![[File:ScavBP Icon.png|250x800px|frameless|link=Scav Backpack]] |
||
![[Scav Backpack]] |
![[Scav Backpack]] |
||
| + | |4x5 |
||
|4x5 |
|4x5 |
||
|20 |
|20 |
||
| Line 182: | Line 201: | ||
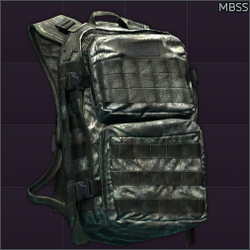
![[File:Flyye MBSS Backpack.png|250x800px|frameless|link=Flyye MBSS Backpack]] |
![[File:Flyye MBSS Backpack.png|250x800px|frameless|link=Flyye MBSS Backpack]] |
||
![[Flyye MBSS Backpack]] |
![[Flyye MBSS Backpack]] |
||
| + | |4x4 |
||
|4x4 |
|4x4 |
||
|16 |
|16 |
||
| Line 192: | Line 212: | ||
![[File:Sanitar Bag Icon.png|250x800px|frameless|link=Sanitar bag]] |
![[File:Sanitar Bag Icon.png|250x800px|frameless|link=Sanitar bag]] |
||
![[Sanitar bag]] |
![[Sanitar bag]] |
||
| + | |4x4 |
||
|4x4 |
|4x4 |
||
|16 |
|16 |
||
| Line 201: | Line 222: | ||
![[File:Duffel icon.png|250x800px|frameless|link=Duffle bag]] |
![[File:Duffel icon.png|250x800px|frameless|link=Duffle bag]] |
||
![[Duffle bag]] |
![[Duffle bag]] |
||
| + | |4x3 |
||
|4x3 |
|4x3 |
||
|12 |
|12 |
||
| Line 210: | Line 232: | ||
![[File:LK 3F backpack icon.png|250x800px|frameless|link=LK 3F Transfer tourist backpack]] |
![[File:LK 3F backpack icon.png|250x800px|frameless|link=LK 3F Transfer tourist backpack]] |
||
![[LK 3F Transfer tourist backpack]] |
![[LK 3F Transfer tourist backpack]] |
||
| + | |3x4 |
||
|3x4 |
|3x4 |
||
|12 |
|12 |
||
| Line 219: | Line 242: | ||
![[File:T-Bag icon.png|250x800px|frameless|link=Transformer Bag]] |
![[File:T-Bag icon.png|250x800px|frameless|link=Transformer Bag]] |
||
![[Transformer Bag]] |
![[Transformer Bag]] |
||
| + | |3x3 |
||
|3x3 |
|3x3 |
||
|9 |
|9 |
||
| Line 228: | Line 252: | ||
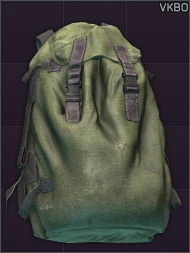
![[File:armybagicon.png|250x800px|frameless|link=VKBO army bag]] |
![[File:armybagicon.png|250x800px|frameless|link=VKBO army bag]] |
||
![[VKBO army bag]] |
![[VKBO army bag]] |
||
| + | |4x2 |
||
|3x4 |
|3x4 |
||
|8 |
|8 |
||
| Line 238: | Line 263: | ||
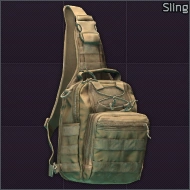
![[File:SlingBackPackIcon.png|250x800px|frameless|link=Tactical sling bag]] |
![[File:SlingBackPackIcon.png|250x800px|frameless|link=Tactical sling bag]] |
||
![[Tactical sling bag]] |
![[Tactical sling bag]] |
||
| + | |3x2 |
||
|3x3 |
|3x3 |
||
|6 |
|6 |
||
Revision as of 10:19, 4 October 2021
Backpacks, packs and bags are containers of varying size for carrying your hard-earned loot.
List
| Icon | Name | Inner grid | Outer grid | Total slots | Storage efficiency | Weight (kg) | Notes | Sold by |
|---|---|---|---|---|---|---|---|---|
| 6SH118 raid backpack | 6x8 | 6x7 | 48 | 1.14 | 3.3 | Prapor LL3 (Barter)
Prapor LL4 (Barter) | ||
| LBT-2670 Slim Field Med Pack | 6x8 | 4x5 | 48 | 2.4 | 1.6 | Only holds: | Therapist LL3 (Barter) | |
| Mystery Ranch Blackjack 50 backpack (multicam) | 6x7 | 5x7 | 42 | 1.2 | 1.2 | Ragman LL4 (Barter) | ||
| Eberlestock F4 Terminator load bearing backpack (tiger stripe) | 1x 5x4 grid 2x 5x2 grid |
5x7 | 40 | 1.14 | 3.63 | Ragman LL3 | ||
|
SSO "Attack 2" raid backpack | 5x7 | 5x7 | 35 | 1 | 3.1 | Ragman LL3 (Barter)
Ragman LL4 (Barter) | |
| Pilgrim tourist backpack | 5x7 | 5x7 | 35 | 1 | 1.5 | Loot only | ||
| 3V G Paratus 3-Day Operator's Tactical Backpack | 1x 5x5 2x 1x2 1x 3x2 |
5x7 | 35 | 1 | 1.3 | Peacekeeper LL4 | ||
|
Eberlestock G2 Gunslinger II backpack (dry earth) | 1x 3x5 grid 1x 2x7 grid 1x 3x2 grid |
5x7 | 35 | 1 | 2.8 | Ragman LL4 | |
| Oakley Mechanism heavy duty backpack (black) | 1x 4x4 4x 2x2 |
5x5 | 32 | 1.28 | 1.25 | Ragman LL3 | ||
|
Camelbak Tri-Zip Backpack | 5x6 | 5x6 | 30 | 1 | 1.3 | Ragman LL3
Ragman LL2 (Barter) | |
|
Ana tactical Beta 2 battle backpack | 5x6 | 5x5 | 30 | 1.2 | 1.1 | Ragman LL4 (Barter) | |
| Eberlestock F5 Switchblade backpack (dry earth) | 5x6 | 5x6 | 30 | 1 | 1.31 | Ragman LL2 | ||
| Hazard 4 Drawbridge backpack | 5x5 | 5x5 | 25 | 1 | 1.6 | Ragman LL3 | ||
|
Hazard4 Takedown sling backpack | 3x8 | 3x7 | 24 | 1.14 | 1.5 | Ragman LL3 (Black) | |
|
Hazard4 Pillbox backpack | 5x4 | 4x4 | 20 | 1.25 | 2.3 | Ragman LL2 | |
| Wartech Berkut VV-102 backpack | 4x5 | 4x5 | 20 | 1 | 0.8 | Ragman LL1
Ragman LL1 (Barter) | ||
| LBT-8005A Day Pack backpack | 4x5 | 4x5 | 20 | 1 | 0.560 | Peacekeeper LL2
Peacekeeper LL1 (Barter) | ||
| Scav Backpack | 4x5 | 4x5 | 20 | 1 | 1.1 | Loot only | ||
|
Flyye MBSS Backpack | 4x4 | 4x4 | 16 | 1 | 0.7 | Ragman LL1
Peacekeeper LL1 (Barter) | |
| Sanitar bag | 4x4 | 4x4 | 16 | 1 | 1.2 | Loot only | ||
| Duffle bag | 4x3 | 4x3 | 12 | 1 | 0.9 | Loot only | ||
| LK 3F Transfer tourist backpack | 3x4 | 3x4 | 12 | 1 | 0.82 | Loot only | ||
| Transformer Bag | 3x3 | 3x3 | 9 | 1 | 0.7 | Loot only | ||
|
VKBO army bag | 4x2 | 3x4 | 8 | 0.66 | 0.8 | Prapor LL1 (Barter)
Jaeger LL1 (Barter) | |
|
Tactical sling bag | 3x2 | 3x3 | 6 | 0.66 | 0.6 | Ragman LL1 |
Upcoming backpacks
| Name | Image | Status | Note |
|---|---|---|---|
| Scorpion Backpack | 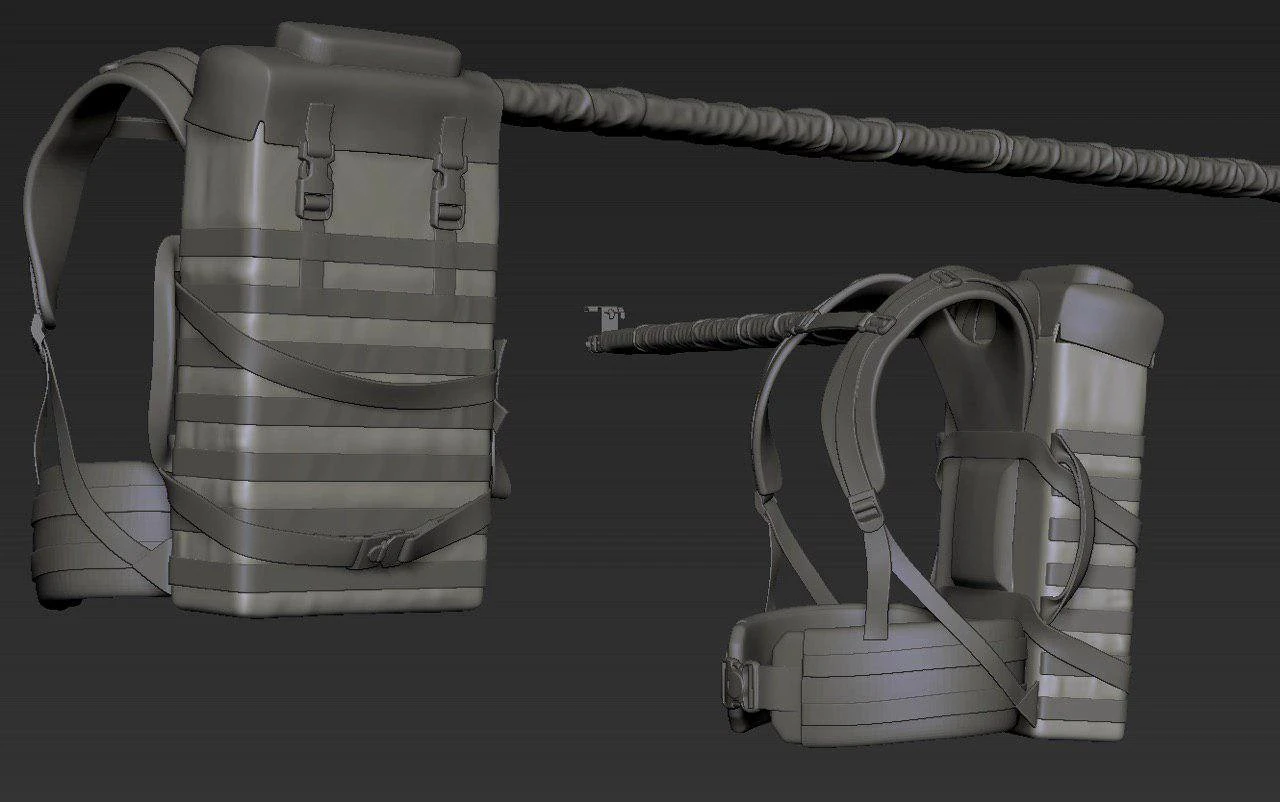
|
Confirmed with screenshot | This is a Russian ammunition Belt Storage or a Feeding Backpack System for LMGs like the PKP Pecheneg. It can hold up to 550 rounds of 7.62x54mmR in the backpack and in the feeding arm. |