SamWaltonBot (talk | contribs) (Updating link to WARTECH TV-110 plate carrier rig after page move.) |
|||
| (29 intermediate revisions by 4 users not shown) | |||
| Line 6: | Line 6: | ||
==Armored== |
==Armored== |
||
{| class="wikitable sortable" |
{| class="wikitable sortable" |
||
| + | ! rowspan="2" |Icon |
||
| − | !style="position: sticky;top: 10px;"|Icon |
||
| + | ! rowspan="2" |Name |
||
| − | !style="position: sticky;top: 10px;"|Name |
||
| + | ! colspan="3" |Inventory |
||
| − | !style="position: sticky;top: 10px;"|Layout |
||
| + | ! colspan="5" |Armor |
||
| − | !style="position: sticky;top: 10px;"|Slots |
||
| + | ! colspan="3" |Penalties |
||
| − | !style="position: sticky;top: 10px;"|Armor class |
||
| − | !style="position: sticky;top: 10px;"|Material |
||
| − | !style="position: sticky;top: 10px;"|Armor zones |
||
| − | !style="position: sticky;top: 10px;"|Durability |
||
| − | !style="position: sticky;top: 10px;"|Effective Durability |
||
| − | !style="position: sticky;top: 10px;"|Movement speed |
||
| − | !style="position: sticky;top: 10px;"|Turn speed |
||
| − | !style="position: sticky;top: 10px;"|Ergonomics |
||
| − | !Weight (kg) |
||
|- |
|- |
||
| + | !Layout |
||
| − | ![[File:6B5-16 armored rig icon.png|250x800px|frameless|link=6B5-16 Zh -86 "Uley" armored rig]] |
||
| + | !Slots |
||
| − | ![[6B5-16 Zh -86 "Uley" armored rig]] |
||
| + | ! Efficiency |
||
| + | ! Material |
||
| + | !Class |
||
| + | !Zones |
||
| + | !Durability |
||
| + | !Effective<br>Durability |
||
| + | !Movement<br>speed |
||
| + | !Turn<br>speed |
||
| + | !Ergo |
||
| + | |- |
||
| + | ! |
||
| + | ! |
||
| + | ! |
||
| + | ! |
||
| + | ! |
||
| + | ! |
||
| + | ! style="position: sticky;top: 10px;" | |
||
| + | ! style="position: sticky;top: 10px;" | |
||
| + | ! |
||
| + | ! |
||
| + | ! style="position: sticky;top: 10px;" | |
||
| + | ! style="position: sticky;top: 10px;" | |
||
| + | ! style="position: sticky;top: 10px;" | |
||
| + | |- |
||
| + | ![[File:6B5-16 armored rig icon.png|250x800px|frameless|link=6B5-16 Zh-86 "Uley" armored rig]] |
||
| + | ![[6B5-16 Zh-86 "Uley" armored rig]] |
||
![[File:6B5-16 inside view.png|250x800px|frameless]] |
![[File:6B5-16 inside view.png|250x800px|frameless]] |
||
|10 |
|10 |
||
| + | |0.833 |
||
| − | |3 |
||
|Titan |
|Titan |
||
| + | |3 |
||
| − | |Thorax and stomach |
||
| + | |Thorax,<br>stomach |
||
|80 |
|80 |
||
|145 |
|145 |
||
| Line 32: | Line 51: | ||
|<font color="red">-5%</font> |
|<font color="red">-5%</font> |
||
|<font color="red">-12</font> |
|<font color="red">-12</font> |
||
| − | |7.1 |
||
|- |
|- |
||
| − | ![[File: |
+ | ![[File:A18 Icon.png|250x800px|frameless|link=Ars Arma A18 Skanda plate carrier]] |
| + | ![[Ars Arma A18 Skanda plate carrier]] |
||
| + | ![[File:A18 Slots.png|250x800px|frameless]] |
||
| + | |25 |
||
| + | |2.083 |
||
| + | |Combined |
||
| + | materials |
||
| + | |4 |
||
| + | |Thorax |
||
| + | |80 |
||
| + | |160 |
||
| + | |<font color="red">-7%</font> |
||
| + | |<font color="red">-4%</font> |
||
| + | |<font color="red">-6</font> |
||
| + | |- |
||
| + | ![[File:Wartech TV-110 plate carrier icon.png|250x800px|frameless|link=WARTECH TV-110 plate carrier rig]] |
||
| + | ![[WARTECH TV-110 plate carrier rig]] |
||
| + | ![[File:Wartech TV-110 plate carrier inside view.png|250x800px|frameless]] |
||
| + | |23 |
||
| + | |1.917 |
||
| + | |Armor |
||
| + | steel |
||
| + | |4 |
||
| + | |Thorax |
||
| + | |85 |
||
| + | |121 |
||
| + | |<font color="red">-8%</font> |
||
| + | |<font color="red">-4%</font> |
||
| + | |<font color="red">-5</font> |
||
| + | |- |
||
| + | ![[File:OspreyMk4 Assault Icon.png|250x800px|frameless|link=CQC Osprey MK4A plate carrier (Assault, MTP)]] |
||
| + | ![[CQC Osprey MK4A plate carrier (Assault, MTP)]] |
||
| + | ![[File:OspreyMk4 Assault Inventory.png|250x800px|frameless]] |
||
| + | |25 |
||
| + | |2.083 |
||
| + | |Aluminium |
||
| + | |4 |
||
| + | |Thorax,<br>arms |
||
| + | |60 |
||
| + | |100 |
||
| + | |<font color="red">-11%</font> |
||
| + | |<font color="red">-11%</font> |
||
| + | |<font color="red">-7</font> |
||
| + | |- |
||
| + | ![[File:6B3TM-01M Icon.png|frameless|250x280px|link=6B3TM-01M armored rig]] |
||
![[6B3TM-01M armored rig]] |
![[6B3TM-01M armored rig]] |
||
| − | ![[File:6B3TM-01M Inside.png|frameless]] |
+ | ![[File:6B3TM-01M Inside.png|250x800px|frameless]] |
|12 |
|12 |
||
| − | | |
+ | |1 |
|Titan |
|Titan |
||
| + | |4 |
||
| − | |Thorax and stomach |
||
| + | |Thorax,<br>stomach |
||
|40 |
|40 |
||
|73 |
|73 |
||
| Line 46: | Line 109: | ||
|<font color="red">-5%</font> |
|<font color="red">-5%</font> |
||
|<font color="red">-15</font> |
|<font color="red">-15</font> |
||
| − | |9.2 |
||
|- |
|- |
||
| − | ![[File:6B5-15icon.png|250x800px|frameless|link=6B5-15 Zh |
+ | ![[File:6B5-15icon.png|250x800px|frameless|link=6B5-15 Zh-86 "Uley" armored rig]] |
| − | ![[6B5-15 Zh |
+ | ![[6B5-15 Zh-86 "Uley" armored rig]] |
![[File:6B5-15 inside view.png|250x800px|frameless]] |
![[File:6B5-15 inside view.png|250x800px|frameless]] |
||
|10 |
|10 |
||
| + | |0.833 |
||
| − | |4 |
||
|Ceramic |
|Ceramic |
||
| + | |4 |
||
| − | |Thorax and stomach |
||
| + | |Thorax,<br>stomach |
||
|50 |
|50 |
||
|63 |
|63 |
||
| Line 60: | Line 123: | ||
|<font color="red">-7%</font> |
|<font color="red">-7%</font> |
||
|<font color="red">-12</font> |
|<font color="red">-12</font> |
||
| − | |12.2 |
||
|- |
|- |
||
![[File:M2Inventory.PNG|250x800px|frameless|link=ANA Tactical M2 armored rig]] |
![[File:M2Inventory.PNG|250x800px|frameless|link=ANA Tactical M2 armored rig]] |
||
| Line 66: | Line 128: | ||
![[File:M2InsideView.png|250x800px|frameless]] |
![[File:M2InsideView.png|250x800px|frameless]] |
||
|18 |
|18 |
||
| + | | 1.125 |
||
| + | |Titan |
||
|4 |
|4 |
||
| + | |Thorax,<br>stomach |
||
| − | |Titan |
||
| − | |Thorax and stomach |
||
|60 |
|60 |
||
|109 |
|109 |
||
| Line 74: | Line 137: | ||
|<font color="red">-5%</font> |
|<font color="red">-5%</font> |
||
|<font color="red">-2</font> |
|<font color="red">-2</font> |
||
| − | |7 |
||
| − | |- |
||
| − | ![[File:OspreyMk4 Assault Icon.png|250x800px|frameless|link=CQC Osprey MK4A plate carrier (Assault, MTP)]] |
||
| − | ![[CQC Osprey MK4A plate carrier (Assault, MTP)]] |
||
| − | ![[File:OspreyMk4 Assault Inventory.png|250x800px|frameless]] |
||
| − | |25 |
||
| − | |4 |
||
| − | |Aluminium |
||
| − | |Thorax, Left Arm, Right Arm |
||
| − | |60 |
||
| − | |100 |
||
| − | |<font color="red">-11%</font> |
||
| − | |<font color="red">-11%</font> |
||
| − | |<font color="red">-7</font> |
||
| − | |10.7 |
||
|- |
|- |
||
![[File:ANA Tactical M1 icon.png|250x800px|frameless|link=ANA Tactical M1 armored rig]] |
![[File:ANA Tactical M1 icon.png|250x800px|frameless|link=ANA Tactical M1 armored rig]] |
||
| Line 94: | Line 142: | ||
![[File:ANA Tactical M1 inside view.png|250x800px|frameless]] |
![[File:ANA Tactical M1 inside view.png|250x800px|frameless]] |
||
|20 |
|20 |
||
| + | |1.25 |
||
| − | |4 |
||
| + | |Armor |
||
| − | |Steel |
||
| + | steel |
||
| − | |Thorax and stomach |
||
| + | | 4 |
||
| + | |Thorax,<br>stomach |
||
|65 |
|65 |
||
|93 |
|93 |
||
| Line 102: | Line 152: | ||
|<font color="red">-5%</font> |
|<font color="red">-5%</font> |
||
|<font color="red">-5</font> |
|<font color="red">-5</font> |
||
| − | |8.3 |
||
|- |
|- |
||
| − | ![[File:AVS icon.png|250x800px|frameless|link=Crye Precision AVS |
+ | ![[File:AVS icon.png|250x800px|frameless|link=Crye Precision AVS plate carrier]] |
| − | ![[Crye Precision AVS |
+ | ![[Crye Precision AVS plate carrier]] |
![[File:AVS Slots.png|250x800px|frameless]] |
![[File:AVS Slots.png|250x800px|frameless]] |
||
|23 |
|23 |
||
| + | |1.917 |
||
| + | |Combined |
||
| + | materials |
||
|4 |
|4 |
||
| + | |Thorax,<br>stomach |
||
| − | |Combined materials |
||
| + | | 70 |
||
| − | |Thorax and stomach |
||
| − | |70 |
||
|140 |
|140 |
||
|<font color="red">-10%</font> |
|<font color="red">-10%</font> |
||
|<font color="red">-2%</font> |
|<font color="red">-2%</font> |
||
|<font color="red">-2</font> |
|<font color="red">-2</font> |
||
| − | |8.7 |
||
|- |
|- |
||
| − | ![[File: |
+ | ![[File:TactecIcon.png|250x800px|frameless|link=5.11 Tactical TacTec plate carrier]] |
| − | ![[ |
+ | ![[5.11 Tactical TacTec plate carrier]] |
| − | ![[File:A18 Slots.png|250x800px|frameless]] |
||
| − | |25 |
||
| − | |4 |
||
| − | |Combined materials |
||
| − | |Thorax |
||
| − | |80 |
||
| − | |160 |
||
| − | |<font color="red">-7%</font> |
||
| − | |<font color="red">-4%</font> |
||
| − | |<font color="red">-6</font> |
||
| − | |8.2 |
||
| − | |- |
||
| − | ![[File:Wartech TV-110 plate carrier icon.png|250x800px|frameless|link=Wartech TV-110 plate carrier]] |
||
| − | ![[WARTECH TV-110 plate carrier rig]] |
||
| − | ![[File:Wartech TV-110 plate carrier inside view.png|250x800px|frameless]] |
||
| − | |23 |
||
| − | |4 |
||
| − | |Steel |
||
| − | |Thorax |
||
| − | |85 |
||
| − | |121 |
||
| − | |<font color="red">-8%</font> |
||
| − | |<font color="red">-4%</font> |
||
| − | |<font color="red">-5</font> |
||
| − | |10.3 |
||
| − | |- |
||
| − | ![[File:TactecIcon.png|250x800px|frameless|link=5.11 Tactec plate carrier]] |
||
| − | ![[5.11 Tactec plate carrier]] |
||
![[File:TactTecInside.png|250x800px|frameless]] |
![[File:TactTecInside.png|250x800px|frameless]] |
||
|18 |
|18 |
||
| + | |1.125 |
||
| + | |UHMWPE |
||
|5 |
|5 |
||
| − | |UHMWPE |
||
|Thorax |
|Thorax |
||
|50 |
|50 |
||
| Line 158: | Line 181: | ||
|<font color="red">-3%</font> |
|<font color="red">-3%</font> |
||
|<font color="red">-3</font> |
|<font color="red">-3</font> |
||
| − | |9.5 |
||
| − | |- |
||
| − | ![[File:MK4A.png|250x800px|frameless]] |
||
| − | ![[CQC Osprey MK4A plate carrier (Protection, MTP)]] |
||
| − | ![[File:format.png|250x800px|frameless]] |
||
| − | |24 |
||
| − | |5 |
||
| − | |Combined materials |
||
| − | |Thorax, Left arm, Right arm |
||
| − | |55 |
||
| − | |110 |
||
| − | |<font color="red">-16%</font> |
||
| − | |<font color="red">-11%</font> |
||
| − | |<font color="red">-11</font> |
||
| − | |12.5 |
||
|- |
|- |
||
![[File:AACPC icon.png|250x800px|frameless|link=Ars Arma CPC MOD.2 plate carrier]] |
![[File:AACPC icon.png|250x800px|frameless|link=Ars Arma CPC MOD.2 plate carrier]] |
||
| Line 178: | Line 186: | ||
![[File:AACPC inside view.png|250x800px|frameless]] |
![[File:AACPC inside view.png|250x800px|frameless]] |
||
|23 |
|23 |
||
| + | |1.917 |
||
| − | |5 |
||
|UHMWPE |
|UHMWPE |
||
| + | |5 |
||
|Thorax |
|Thorax |
||
|60 |
|60 |
||
| Line 186: | Line 195: | ||
|<font color="red">-3%</font> |
|<font color="red">-3%</font> |
||
|<font color="red">-5</font> |
|<font color="red">-5</font> |
||
| − | |8.5 |
||
|- |
|- |
||
| − | ![[File: |
+ | ![[File:MK4A.png|250x800px|frameless|link=CQC Osprey MK4A plate carrier (Protection, MTP)]] |
| + | ![[CQC Osprey MK4A plate carrier (Protection, MTP)]] |
||
| + | ![[File:format.png|250x800px|frameless]] |
||
| + | |24 |
||
| + | |2 |
||
| + | |Combined |
||
| + | materials |
||
| + | |5 |
||
| + | |Thorax,<br>arms |
||
| + | |55 |
||
| + | |110 |
||
| + | |<font color="red">-16%</font> |
||
| + | |<font color="red">-11%</font> |
||
| + | |<font color="red">-11</font> |
||
| + | |- |
||
| + | ![[File:MBAV icon.png|250x800px|frameless|link=Crye Precision AVS MBAV (Tagilla Edition)]] |
||
![[Crye Precision AVS MBAV (Tagilla Edition)]] |
![[Crye Precision AVS MBAV (Tagilla Edition)]] |
||
![[File:AVS MBAV Inside View.png|250x800px|frameless]] |
![[File:AVS MBAV Inside View.png|250x800px|frameless]] |
||
|12 |
|12 |
||
| + | |1.333 |
||
| − | |6 |
||
|Titan |
|Titan |
||
| + | |6 |
||
|Thorax |
|Thorax |
||
|60 |
|60 |
||
| Line 200: | Line 224: | ||
|<font color="red">-5%</font> |
|<font color="red">-5%</font> |
||
|<font color="red">-8</font> |
|<font color="red">-8</font> |
||
| − | |7.8 |
||
|} |
|} |
||
==Unarmored== |
==Unarmored== |
||
{| class="wikitable sortable" |
{| class="wikitable sortable" |
||
| − | !style="position: sticky;top: 10px;"|Icon |
+ | ! style="position: sticky;top: 10px;" |Icon |
| − | !style="position: sticky;top: 10px;"|Name |
+ | ! style="position: sticky;top: 10px;" |Name |
| − | !style="position: sticky;top: 10px;"|Layout |
+ | ! style="position: sticky;top: 10px;" |Layout |
| − | !style="position: sticky;top: 10px;"|Total Slots |
+ | ! style="position: sticky;top: 10px;" |Total Slots |
| − | !style="position: sticky;top: 10px;"|Weight(KG) |
||
| − | !style="position: sticky;top: 10px;"|Efficiency |
||
|- |
|- |
||
![[File:Scav Vest icon.png|250x800px|frameless|link=Scav Vest]] |
![[File:Scav Vest icon.png|250x800px|frameless|link=Scav Vest]] |
||
| Line 216: | Line 237: | ||
![[File:Scav Vest Slots.png|250x800px|frameless]] |
![[File:Scav Vest Slots.png|250x800px|frameless]] |
||
|6 |
|6 |
||
| − | |0.4 |
||
| − | |1.000 |
||
|- |
|- |
||
![[File:Securityvesticon.png|250x800px|frameless|link=Security vest]] |
![[File:Securityvesticon.png|250x800px|frameless|link=Security vest]] |
||
| Line 223: | Line 242: | ||
![[File:Securityvestslots.png|250x800px|frameless]] |
![[File:Securityvestslots.png|250x800px|frameless]] |
||
|6 |
|6 |
||
| − | |0.51 |
||
| − | |1.000 |
||
|- |
|- |
||
| − | ![[File:DIY IDEArig icon.png|frameless|link=DIY IDEA chest rig]] |
+ | ![[File:DIY IDEArig icon.png|250x800px|frameless|link=DIY IDEA chest rig]] |
![[DIY IDEA chest rig]] |
![[DIY IDEA chest rig]] |
||
![[File:BankRobberRigInside.png|250x800px|frameless]] |
![[File:BankRobberRigInside.png|250x800px|frameless]] |
||
|8 |
|8 |
||
| − | |0.22 |
||
| − | |1.334 |
||
|- |
|- |
||
| − | ![[File:Bank Robber icon.png|250x800px|frameless|link=Spiritus Systems Bank Robber |
+ | ![[File:Bank Robber icon.png|250x800px|frameless|link=Spiritus Systems Bank Robber chest rig]] |
| − | ![[Spiritus Systems Bank Robber |
+ | ![[Spiritus Systems Bank Robber chest rig]] |
![[File:BankRobberRigInside.png|250x800px|frameless]] |
![[File:BankRobberRigInside.png|250x800px|frameless]] |
||
|8 |
|8 |
||
| − | |0.7 |
||
| − | |1.334 |
||
|- |
|- |
||
![[File:SOEicon.png|250x800px|frameless|link=SOE Micro Rig]] |
![[File:SOEicon.png|250x800px|frameless|link=SOE Micro Rig]] |
||
| Line 244: | Line 257: | ||
![[File:SOE micro rig.png|250x800px|frameless]] |
![[File:SOE micro rig.png|250x800px|frameless]] |
||
|8 |
|8 |
||
| − | |0.8 |
||
| − | |1.334 |
||
|- |
|- |
||
| − | ![[File:Wartech gear rig icon.png|250x800px|frameless|link= |
+ | ![[File:Wartech gear rig icon.png|250x800px|frameless|link=WARTECH TV-109 + TV-106 chest rig]] |
![[WARTECH TV-109 + TV-106 chest rig]] |
![[WARTECH TV-109 + TV-106 chest rig]] |
||
![[File:Wartech Slots.png|250x800px|frameless]] |
![[File:Wartech Slots.png|250x800px|frameless]] |
||
|10 |
|10 |
||
| − | |1.8 |
||
| − | |1.111 |
||
|- |
|- |
||
![[File:CSAicon.png|250x800px|frameless|link=CSA chest rig]] |
![[File:CSAicon.png|250x800px|frameless|link=CSA chest rig]] |
||
| Line 258: | Line 267: | ||
![[File:CSALayout.png|250x800px|frameless]] |
![[File:CSALayout.png|250x800px|frameless]] |
||
|10 |
|10 |
||
| − | |0.750 |
||
| − | |1.667 |
||
|- |
|- |
||
![[File:Scout Sniper rig icon.png|250x800px|frameless|link=UMTBS 6sh112 Scout-Sniper]] |
![[File:Scout Sniper rig icon.png|250x800px|frameless|link=UMTBS 6sh112 Scout-Sniper]] |
||
| Line 265: | Line 272: | ||
![[File:Scout Sniper rig Slots.png|250x800px|frameless]] |
![[File:Scout Sniper rig Slots.png|250x800px|frameless]] |
||
|12 |
|12 |
||
| − | |1.7 |
||
| − | |1.000 |
||
|- |
|- |
||
| − | ![[File:Tarzan icon.png|250x800px|frameless|link=Splav Tarzan M22 |
+ | ![[File:Tarzan icon.png|250x800px|frameless|link=Splav Tarzan M22 chest rig]] |
| − | ![[Splav Tarzan M22 |
+ | ![[Splav Tarzan M22 chest rig]] |
![[File:TarzanRigInside.png|250x800px|frameless]] |
![[File:TarzanRigInside.png|250x800px|frameless]] |
||
|14 |
|14 |
||
| − | |1.45 |
||
| − | |1.167 |
||
|- |
|- |
||
![[File:D3CRX Icon.PNG|250x800px|frameless|link=Haley Strategic D3CRX Chest Harness]] |
![[File:D3CRX Icon.PNG|250x800px|frameless|link=Haley Strategic D3CRX Chest Harness]] |
||
| Line 279: | Line 282: | ||
![[File:D3CRX Slots.PNG|250x800px|frameless]] |
![[File:D3CRX Slots.PNG|250x800px|frameless]] |
||
|16 |
|16 |
||
| − | |0.9 |
||
| − | |1.778 |
||
|- |
|- |
||
| − | ![[File:Triton M43-A Chest Harness icon.png|250x800px|frameless|link=Triton M43-A |
+ | ![[File:Triton M43-A Chest Harness icon.png|250x800px|frameless|link=Dynaforce Triton M43-A chest harness]] |
| − | ![[Triton M43-A |
+ | ![[Dynaforce Triton M43-A chest harness]] |
![[File:TritonRigInside.png|250x800px|frameless]] |
![[File:TritonRigInside.png|250x800px|frameless]] |
||
|16 |
|16 |
||
| − | |1.3 |
||
| − | |1.334 |
||
|- |
|- |
||
![[File:Blackhawk! commando icon.gif|250x800px|frameless|link=Blackhawk! Commando Chest Harness]] |
![[File:Blackhawk! commando icon.gif|250x800px|frameless|link=Blackhawk! Commando Chest Harness]] |
||
| Line 293: | Line 292: | ||
![[File:CommandoRigInside.png|250x800px|frameless]] |
![[File:CommandoRigInside.png|250x800px|frameless]] |
||
|16 |
|16 |
||
| − | |1.35 |
||
| − | |1.334 |
||
|- |
|- |
||
![[File:Direct Action Thunderbolt compact chest rig icon.png|250x800px|frameless|link=Direct Action Thunderbolt compact chest rig]] |
![[File:Direct Action Thunderbolt compact chest rig icon.png|250x800px|frameless|link=Direct Action Thunderbolt compact chest rig]] |
||
| Line 300: | Line 297: | ||
![[File:Direct Action Thunderbolt compact chest rig layout.png|250x800px|frameless]] |
![[File:Direct Action Thunderbolt compact chest rig layout.png|250x800px|frameless]] |
||
|16 |
|16 |
||
| − | |0.62 |
||
| − | |1.778 |
||
|- |
|- |
||
| − | ![[File:Gc-bss-mk1.png|250x800px|frameless|link=Gear Craft GC-BSS-MK1 rig]] |
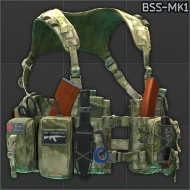
+ | ![[File:Gc-bss-mk1.png|250x800px|frameless|link=Gear Craft GC-BSS-MK1 chest rig]] |
| − | ![[Gear Craft GC-BSS-MK1 rig]] |
+ | ![[Gear Craft GC-BSS-MK1 chest rig]] |
![[File:BSS-Mk1 Layout.png|250x800px|frameless]] |
![[File:BSS-Mk1 Layout.png|250x800px|frameless]] |
||
|16 |
|16 |
||
| − | |0.62 |
||
| − | |1.778 |
||
|- |
|- |
||
| − | ![[File:M33-SET1 vest icon.png|250x800px|frameless|link=Umka |
+ | ![[File:M33-SET1 vest icon.png|250x800px|frameless|link=Umka M33-SET1 hunter vest]] |
| − | ![[Umka |
+ | ![[Umka M33-SET1 hunter vest]] |
![[File:М33-SET1 vest layout.png|250x800px|frameless]] |
![[File:М33-SET1 vest layout.png|250x800px|frameless]] |
||
|16 |
|16 |
||
| − | |1.2 |
||
| − | |1.333 |
||
|- |
|- |
||
| − | ![[File:LBCR LBT-1961A Icon.png|frameless| |
+ | ![[File:LBCR LBT-1961A Icon.png|frameless|250x800px|link=LBT-1961A Load Bearing chest rig]] |
| − | ![[LBT-1961A Load Bearing |
+ | ![[LBT-1961A Load Bearing chest rig]] |
![[File:LBT 1961 Slots.png|250x800px|frameless]] |
![[File:LBT 1961 Slots.png|250x800px|frameless]] |
||
|18 |
|18 |
||
| − | |1.360 |
||
| − | |2.000 |
||
|- |
|- |
||
![[File:StichMk2Recon Icon.png|250x800px|frameless|link=Stich Profi Chest Rig MK2 (Recon, A-TACS FG)]] |
![[File:StichMk2Recon Icon.png|250x800px|frameless|link=Stich Profi Chest Rig MK2 (Recon, A-TACS FG)]] |
||
| Line 328: | Line 317: | ||
![[File:StichMk2Recon Inventory.png|250x800px|frameless]] |
![[File:StichMk2Recon Inventory.png|250x800px|frameless]] |
||
|18 |
|18 |
||
| − | |1.4 |
||
| − | |1.5 |
||
|- |
|- |
||
![[File:StichMk2Assault Icon .png|250x800px|frameless|link=Stich Profi Chest Rig MK2 (Assault, A-TACS FG)]] |
![[File:StichMk2Assault Icon .png|250x800px|frameless|link=Stich Profi Chest Rig MK2 (Assault, A-TACS FG)]] |
||
| Line 335: | Line 322: | ||
![[File:StichMk2Assault Inventory.png|250x800px|frameless]] |
![[File:StichMk2Assault Inventory.png|250x800px|frameless]] |
||
|18 |
|18 |
||
| − | |1.75 |
||
| − | |1.5 |
||
|- |
|- |
||
![[File:Blackrock Icon.png|250x800px|frameless|link=BlackRock chest rig]] |
![[File:Blackrock Icon.png|250x800px|frameless|link=BlackRock chest rig]] |
||
| Line 342: | Line 327: | ||
![[File:Blackrock Slots.png|250x800px|frameless]] |
![[File:Blackrock Slots.png|250x800px|frameless]] |
||
|20 |
|20 |
||
| − | |1.8 |
||
| − | |1.667 |
||
|- |
|- |
||
| − | ![[File:Mk3.PNG|250x800px|frameless|link= |
+ | ![[File:Mk3.PNG|250x800px|frameless|link=WARTECH MK3 TV-104 chest rig]] |
![[WARTECH MK3 TV-104 chest rig]] |
![[WARTECH MK3 TV-104 chest rig]] |
||
![[File:MK3InsideView.png|250x800px|frameless]] |
![[File:MK3InsideView.png|250x800px|frameless]] |
||
|20 |
|20 |
||
| − | |1.65 |
||
| − | |1.667 |
||
|- |
|- |
||
![[File:Alpha Rig icon.png|250x800px|frameless|link=ANA Tactical Alpha chest rig]] |
![[File:Alpha Rig icon.png|250x800px|frameless|link=ANA Tactical Alpha chest rig]] |
||
| Line 356: | Line 337: | ||
![[File:Alpha Rig Slots.png|250x800px|frameless]] |
![[File:Alpha Rig Slots.png|250x800px|frameless]] |
||
|20 |
|20 |
||
| − | |1.7 |
||
| − | |1.250 |
||
|- |
|- |
||
| − | ![[File:Azimutharness.gif|250x800px|frameless|link=Azimut SS |
+ | ![[File:Azimutharness.gif|250x800px|frameless|link=Azimut SS Zhuk Chest Harness]] |
| − | ![[Azimut SS |
+ | ![[Azimut SS Zhuk Chest Harness]] |
![[File:Azimutlayout.png|250x800px|frameless]] |
![[File:Azimutlayout.png|250x800px|frameless]] |
||
|20 |
|20 |
||
| − | |1.6 |
||
| − | |1.667 |
||
|- |
|- |
||
![[File:MPPV ICon.png|250x800px|frameless|link=Velocity Systems Multi-Purpose Patrol Vest]] |
![[File:MPPV ICon.png|250x800px|frameless|link=Velocity Systems Multi-Purpose Patrol Vest]] |
||
| Line 370: | Line 347: | ||
![[File:MPPV INTERNAL VIEW.png|250x800px|frameless]] |
![[File:MPPV INTERNAL VIEW.png|250x800px|frameless]] |
||
|24 |
|24 |
||
| − | |1.6 |
||
| − | |2.000 |
||
|- |
|- |
||
![[File:Belt-A Belt-B gear rig icon.png|250x800px|frameless|link=Belt-A + Belt-B gear rig]] |
![[File:Belt-A Belt-B gear rig icon.png|250x800px|frameless|link=Belt-A + Belt-B gear rig]] |
||
| Line 377: | Line 352: | ||
![[File:Belt-A Belt-B gear rig inside view.png|250x800px|frameless]] |
![[File:Belt-A Belt-B gear rig inside view.png|250x800px|frameless]] |
||
|25 |
|25 |
||
| − | |1.7 |
||
| − | |1.563 |
||
|} |
|} |
||
=Upcoming Chest Rigs= |
=Upcoming Chest Rigs= |
||
==Armored== |
==Armored== |
||
| − | {|class="wikitable" |
+ | {| class="wikitable" |
!Name |
!Name |
||
!Image |
!Image |
||
| Line 394: | Line 367: | ||
==Unarmored== |
==Unarmored== |
||
| − | {|class="wikitable" |
+ | {| class="wikitable" |
!Name |
!Name |
||
!Image |
!Image |
||
Revision as of 22:22, 28 November 2021
Chest rigs play the most important role in your adventures into Tarkov - Carrying and storing magazines and ammunition. Some types even offer you additional protection.
To learn more about the effectiveness of armored chest rigs check the Ballistics page.
List
Armored
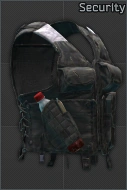
| Icon | Name | Inventory | Armor | Penalties | ||||||||
|---|---|---|---|---|---|---|---|---|---|---|---|---|
| Layout | Slots | Efficiency | Material | Class | Zones | Durability | Effective Durability |
Movement speed |
Turn speed |
Ergo | ||
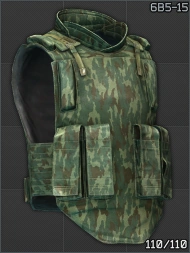
| 6B5-16 Zh-86 "Uley" armored rig | 
|
10 | 0.833 | Titan | 3 | Thorax, stomach |
80 | 145 | -9% | -5% | -12 | |
| Ars Arma A18 Skanda plate carrier | 
|
25 | 2.083 | Combined
materials |
4 | Thorax | 80 | 160 | -7% | -4% | -6 | |
| WARTECH TV-110 plate carrier rig | 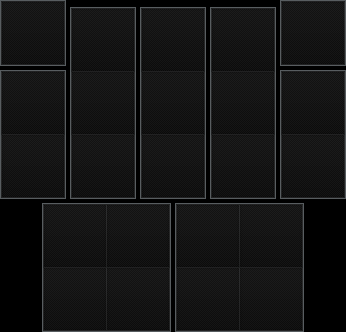
|
23 | 1.917 | Armor
steel |
4 | Thorax | 85 | 121 | -8% | -4% | -5 | |
| CQC Osprey MK4A plate carrier (Assault, MTP) | 
|
25 | 2.083 | Aluminium | 4 | Thorax, arms |
60 | 100 | -11% | -11% | -7 | |
| 6B3TM-01M armored rig | 
|
12 | 1 | Titan | 4 | Thorax, stomach |
40 | 73 | -10% | -5% | -15 | |
|
6B5-15 Zh-86 "Uley" armored rig | 
|
10 | 0.833 | Ceramic | 4 | Thorax, stomach |
50 | 63 | -14% | -7% | -12 |
|
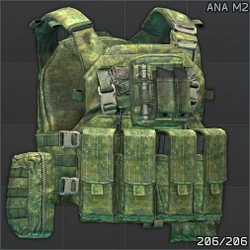
ANA Tactical M2 armored rig | 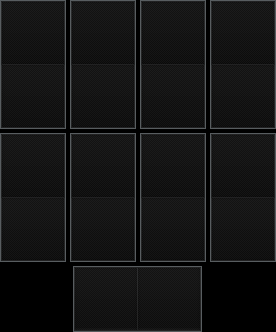
|
18 | 1.125 | Titan | 4 | Thorax, stomach |
60 | 109 | -8% | -5% | -2 |
| ANA Tactical M1 armored rig | 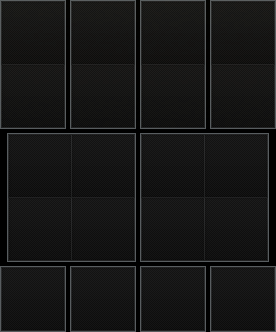
|
20 | 1.25 | Armor
steel |
4 | Thorax, stomach |
65 | 93 | -10% | -5% | -5 | |
| Crye Precision AVS plate carrier | 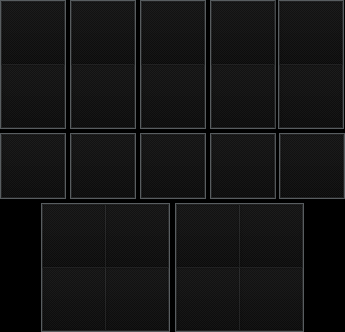
|
23 | 1.917 | Combined
materials |
4 | Thorax, stomach |
70 | 140 | -10% | -2% | -2 | |
|
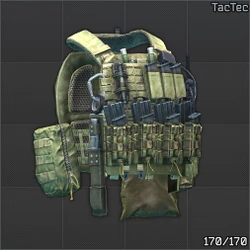
5.11 Tactical TacTec plate carrier | 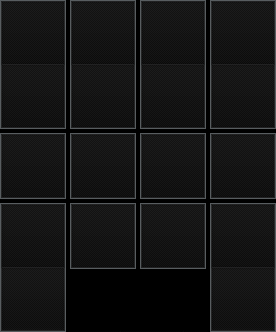
|
18 | 1.125 | UHMWPE | 5 | Thorax | 50 | 111 | -7% | -3% | -3 |
| Ars Arma CPC MOD.2 plate carrier | 
|
23 | 1.917 | UHMWPE | 5 | Thorax | 60 | 133 | -6% | -3% | -5 | |
| File:MK4A.png | CQC Osprey MK4A plate carrier (Protection, MTP) | File:Format.png | 24 | 2 | Combined
materials |
5 | Thorax, arms |
55 | 110 | -16% | -11% | -11 |
| Crye Precision AVS MBAV (Tagilla Edition) | 
|
12 | 1.333 | Titan | 6 | Thorax | 60 | 109 | -6% | -5% | -8 | |
Unarmored
| Icon | Name | Layout | Total Slots |
|---|---|---|---|
| Scav Vest | 
|
6 | |
|
Security vest | 
|
6 |
| DIY IDEA chest rig | 
|
8 | |
| Spiritus Systems Bank Robber chest rig |
|
8 | |
|
SOE Micro Rig | 
|
8 |
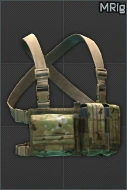
| WARTECH TV-109 + TV-106 chest rig | 
|
10 | |
|
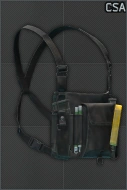
CSA chest rig | 
|
10 |
| UMTBS 6sh112 Scout-Sniper | 
|
12 | |
| Splav Tarzan M22 chest rig | 
|
14 | |
| Haley Strategic D3CRX Chest Harness | 
|
16 | |
| Dynaforce Triton M43-A chest harness | 
|
16 | |
| Blackhawk! Commando Chest Harness | 
|
16 | |
| Direct Action Thunderbolt compact chest rig | 
|
16 | |
|
Gear Craft GC-BSS-MK1 chest rig | 
|
16 |
| Umka M33-SET1 hunter vest | 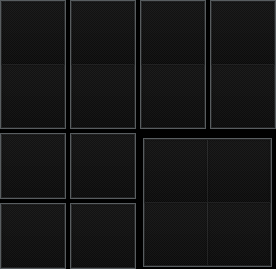
|
16 | |
| LBT-1961A Load Bearing chest rig | 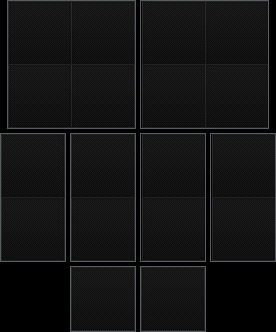
|
18 | |
| Stich Profi Chest Rig MK2 (Recon, A-TACS FG) | 
|
18 | |
| Stich Profi Chest Rig MK2 (Assault, A-TACS FG) | 
|
18 | |
| BlackRock chest rig | 
|
20 | |

|
WARTECH MK3 TV-104 chest rig | 
|
20 |
| ANA Tactical Alpha chest rig | 
|
20 | |

|
Azimut SS Zhuk Chest Harness | 
|
20 |
| Velocity Systems Multi-Purpose Patrol Vest | 
|
24 | |
| Belt-A + Belt-B gear rig | 
|
25 |
Upcoming Chest Rigs
Armored
| Name | Image | Status |
|---|---|---|
| Paraclete Armis GEN II plate carrier | 
|
Confirmed with screenshot |
Unarmored
| Name | Image | Status |
|---|---|---|
| 6Sh117 | 
|
Confirmed with screenshot |
- Additionally MOLLE rigs/modular rigs were confirmed in various interviews with Nikita Buyanov.